
Redo App Certificates
Active Certificates are needed to ensure that your app functions correctly, as well as prevent a break in your Push Notification service.
App certificates are only valid for 1 year.NB! If one of your certificates expire, it is important to redo all of them in the exact order presented below.
First – Account certificate
Second – Push Certificate
Third – Provisioning Profile
Account Certificate
Step 01
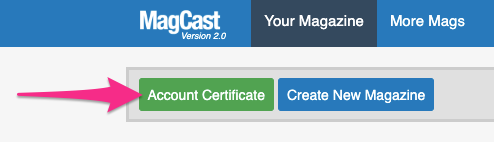
Open your MagCast dashboard and click on the Account certificate button top-left.
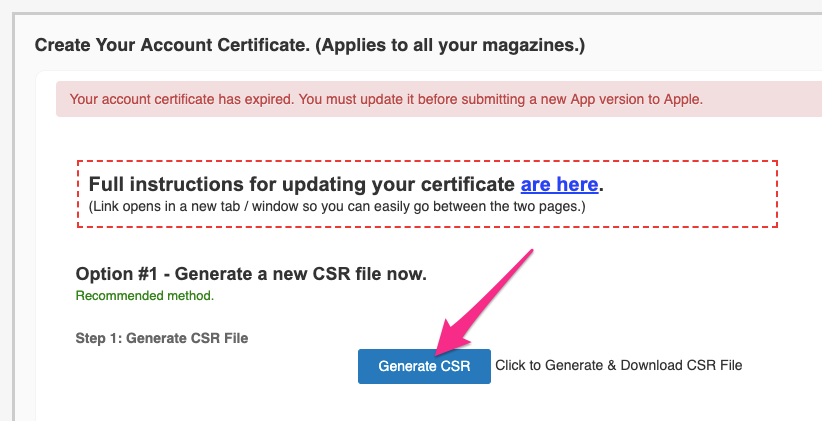
In the next screen, click on Generate CSR to download your CSR file to your computer.
TIP! If you’re a Developer and already have your own P12 file, simply scroll down to
Option #2 – I Already Have MY OWN Apple Distribution P12 file section to upload it.
This step will immediately activate your Account Certificate for you.
Step 02
Open Apple Developer Portal in a new tab.
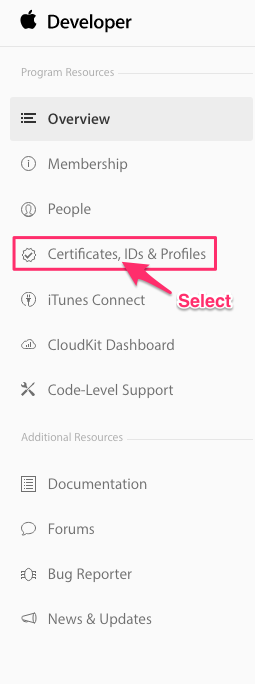
In the next screen, select Certificates, ID’s & Profiles in the left-sidebar menu.
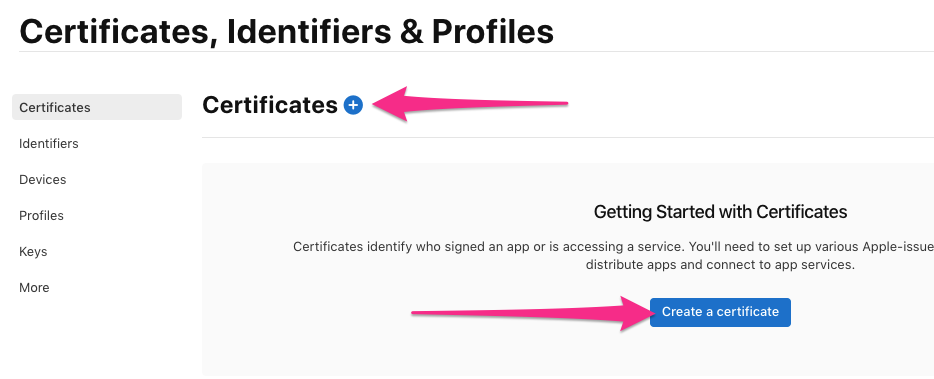
In the next screen, click on Certificates in the left sidebar.

Here you will take one of two actions:
-
Option 01
If your certificates have already expired, you should see no active certificates in the Certificates section.
In this case you simply click on the (+) icon or the Create a Certificate button in the middle of the page and proceed to Step 3 below.
-
Option 02
If your certificates have NOT expired yet, it’s important to revoke your old certificates before redoing the new ones.
To do this, click on your iOS Distribution and Apple Push Certificates and then click on the Revoke button. If you don’t revoke your old certificates first, your new certificates won’t work correctly.
Once certificates are revoked, click on the (+) icon or the Create a Certificate button in the middle of the page and proceed to Step 3 below.
Step 03
In the next screen, tick the option iOS Distribution (App Store and Ad Hoc).
Then click on Continue in the top-right corner.

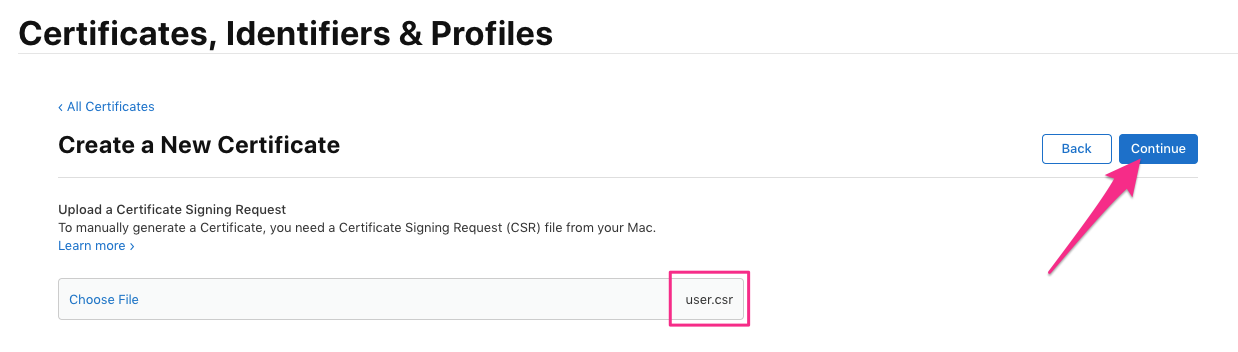
Step 04
In the next screen, click on Choose File

Select user.csr file saved to your computer.
Once done, click on Continue in the top-right corner.
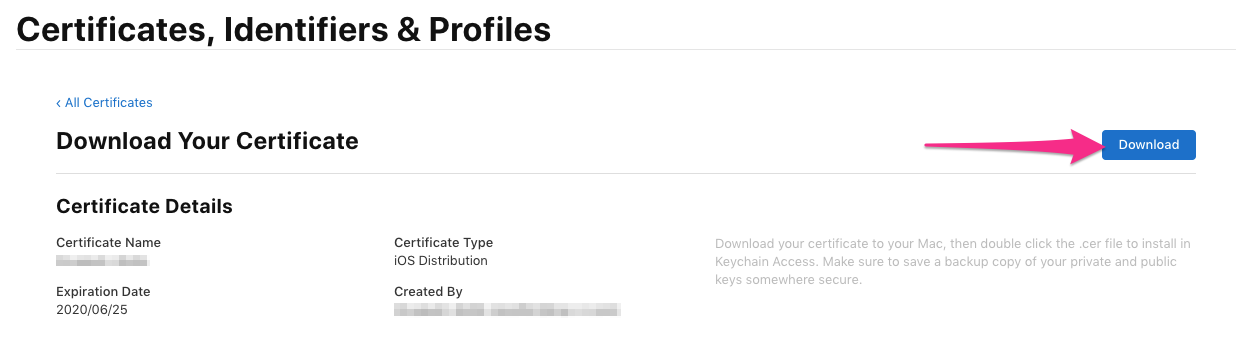
Step 05
Once the Certificate is ready, click the Download button and the IOS_Distribution.cer file will download to your computer.
Step 06
Go back to Account Certificate section of MagCast
In the next screen, scroll down to Option #1 – Generate a new CSR file now
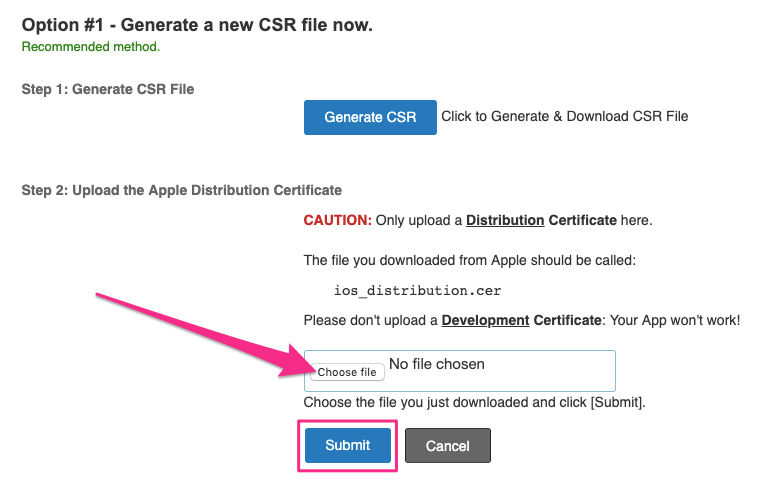
Under Step 2: Upload the Apple Distribution Certificate
a) Click on Choose File
b) Choose the IOS_Distribution.cer file
c) Click on open
d) Click Submit
TIP! Once uploaded, check your browser address bar to confirm if upload worked.
If it says (stat=ok), then your Account Certificate has successfully been redone!
![]()
Click on Your Magazine to go back to Main Dashboard.
Push Certificate
Step 01
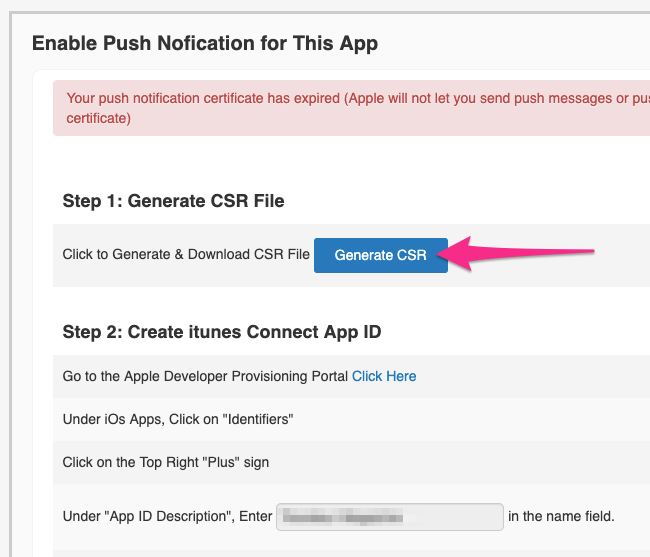
In the MagCast Dashboard, click on Setup Menu
Then select Enable Push

Click on Generate CSR to download the CSR file to your computer.
Step 02
Open Apple Developer Portal in a new tab
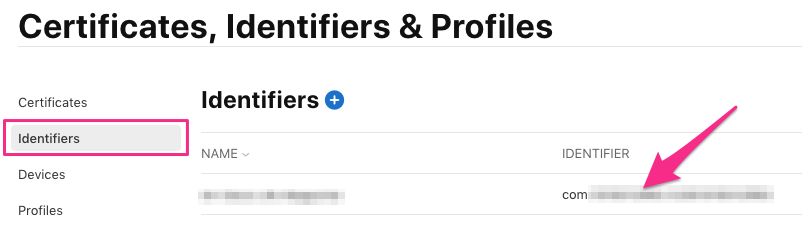
Ensure that Identifiers is selected in the left sidebar.
Then click on the Bundle ID of the app that needs to be edited.
In the next screen, under Capabilities section, enable Associated Domains setting (if not already enabled). NB! This setting is mandatory if you want to use Instant Audience or the One-Tap App Install Links (OTAI) feature.

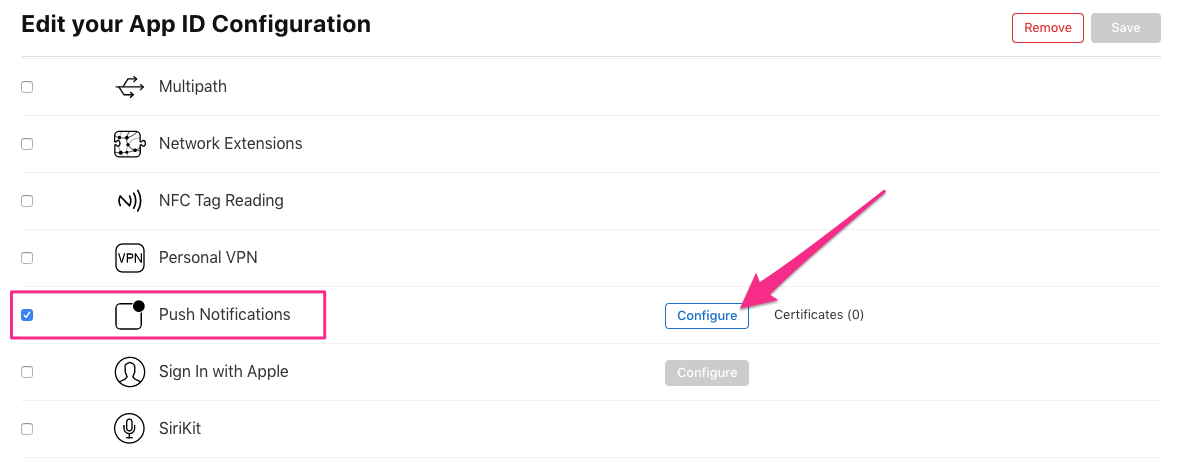
Next, scroll down to Push Notifications and tick to enable this setting.
Then click on Configure
A pop-up will appear.
In this screen, under Production SSL Certificate, click on Create Certificate.

In the next screen, click Choose file
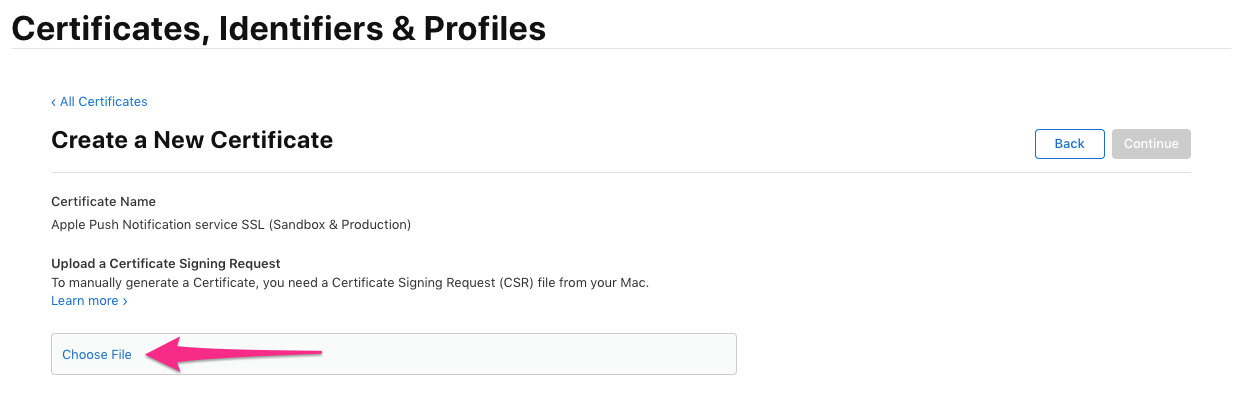
a.) select CSR file saved to your computer
b.) click Open
c.) click on Continue top-right to create your aps.cer file.

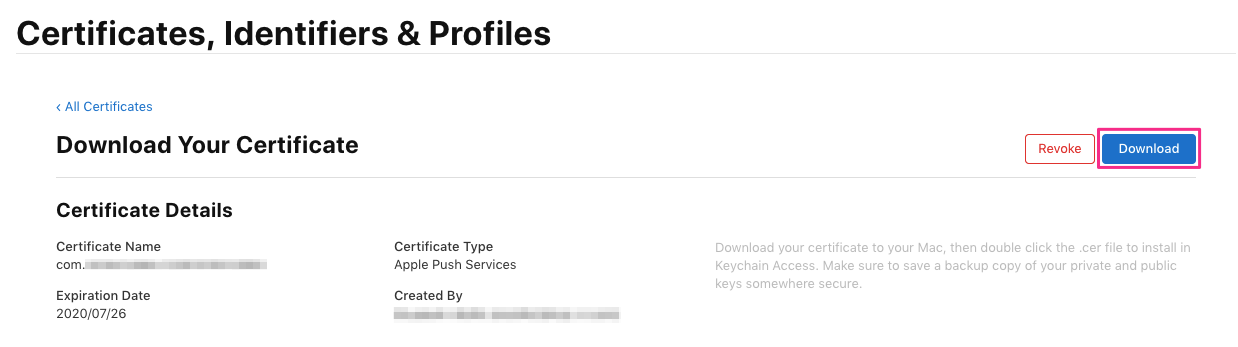
Once processed, Download your aps.cer file
Step 03
Go back to the Enable Push section in Magcast (Setup menu).
Scroll down to Step 5: Upload .CER File

a) Click on Choose File
b) Choose the aps.cer file
c) Click on open
d) Click Upload
TIP! Once uploaded, check your browser address bar to confirm if upload worked.
If it says (stat=ok), then your Push Certificate has successfully been redone!
![]()
Click on Your Magazine to go back to Main Dashboard.
Provisioning Profile
Step 01
In the MagCast Dashboard, click on Setup Menu
Then select Profile

Step 02
Open Apple Developer Portal in a new tab
Ensure Profiles is selected in the left-sidebar.
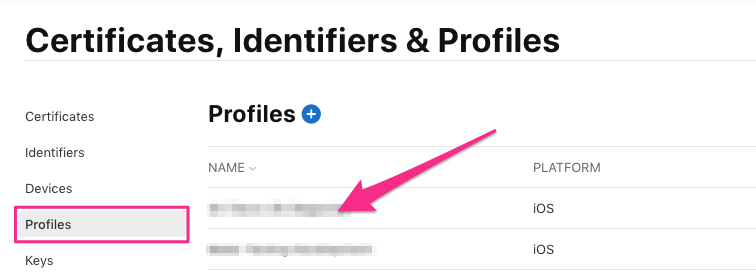
To the right, search for your App’s name and click on it.
In the next screen:
a.) Under App ID, ensure the correct Bundle ID is selected in the dropdown menu.
b.) Under Certificates, ensure that your iOS Distribution Certificate is selected.
c.) Then click on Save.

The screen will update and give you an option to download the generated Mobile Provisioning file. Click Download and save your .mobileprovision file to your computer.

Step 03
Go back to the Profile section in Magcast (Setup menu).
Scroll down and look for Step 3: Upload your .Mobileprovision file
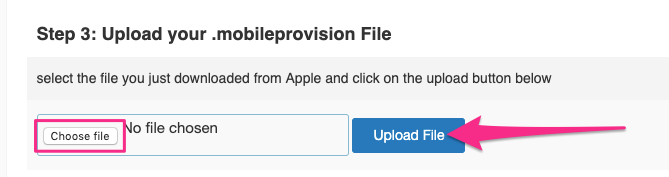
a.) click on Choose File
b.) select .Mobileprovision file
c.) click Open
d.) click on Upload File
TIP! Once uploaded, check your browser address bar to confirm if upload worked.
If it says (stat=ok), then your Provisioning Profile has successfully been redone!
![]()
That’s it! Your App Certificates are valid for another year.
 Get help for this page
 Jitbit HelpDesk